Created: 01.Aug.2017
By: mimtiyaz
 Welcome to Multilingual User Management, a fully responsive, user friendly and full featured multilingual web application. This application is built on Microsoft .NET using the popular Bootstrap framework which allows users to easily integrate any existing project. It comes with a couple of third-party plugins redesigned to fit with the rest of the elements. It supports four languages: English, Arabic, Russian and French. More languages can be added as needed.
This application is designed using high quality scripts created by mimtiyaz exclusively for CodeCanyon
This documentation is targetted to explain the installation and guide to use this application. All files are organized and are easily editable. To get a deeper understanding of the code, open the HTML, JS, CS, SQL file and read through the commented code.
In order to install this application, your server must meet the following requirements:
Follow the steps below to install this application:
In Database folder, open SQL Database Script file "MUM_v2.1.sql" in SQL Query Analyzer and execute it. The database will be created.
To run the application, open "MUM_CC_v2.1.sln" file available in Source Code folder.
Multilingual User Management uses system's default localization to allow you to translate it to any language you want. All translation files are located in App_LocalResources folder in the respective directories.
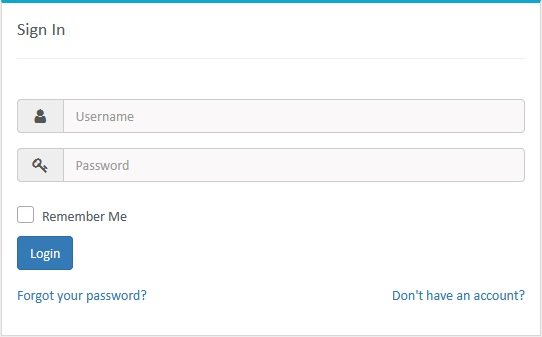
After accessing the multilingual user management application's URL, user will be automatically redirected to the login page. Users are able to login by typing their usernames or email and password. Login form is displayed below:
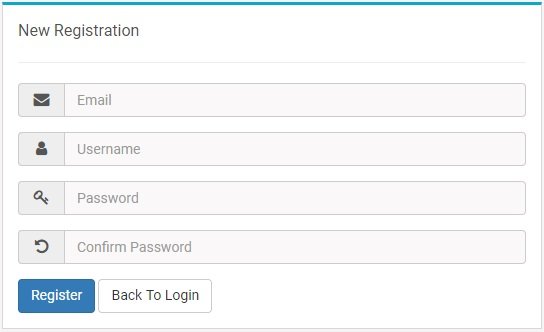
Users are able to access the registration form and create new account by clicking the Don't have an account? link on login page and filling up the registration form. Registration form is displayed below:
After successful registration, an email will be sent to the registered email address to authenticate the user. Click the "Confirm Now" button in the email and activate your account.
In case that some users forgot their password, they will be able to reset it from Forgot Password form available, after clicking Forgot your password? link on login page. Reset password form is displayed below:
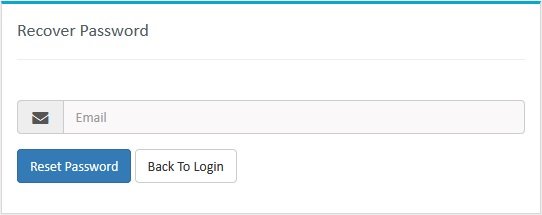
To retrieve the password, provide the email address used at the time of registration. Once the email is confirmed, password will be sent at the registered email address.
Dashboard are able to see some system stats on their dashboard page. There are basically two dashboards in this application, one is for Admin and another is for User.
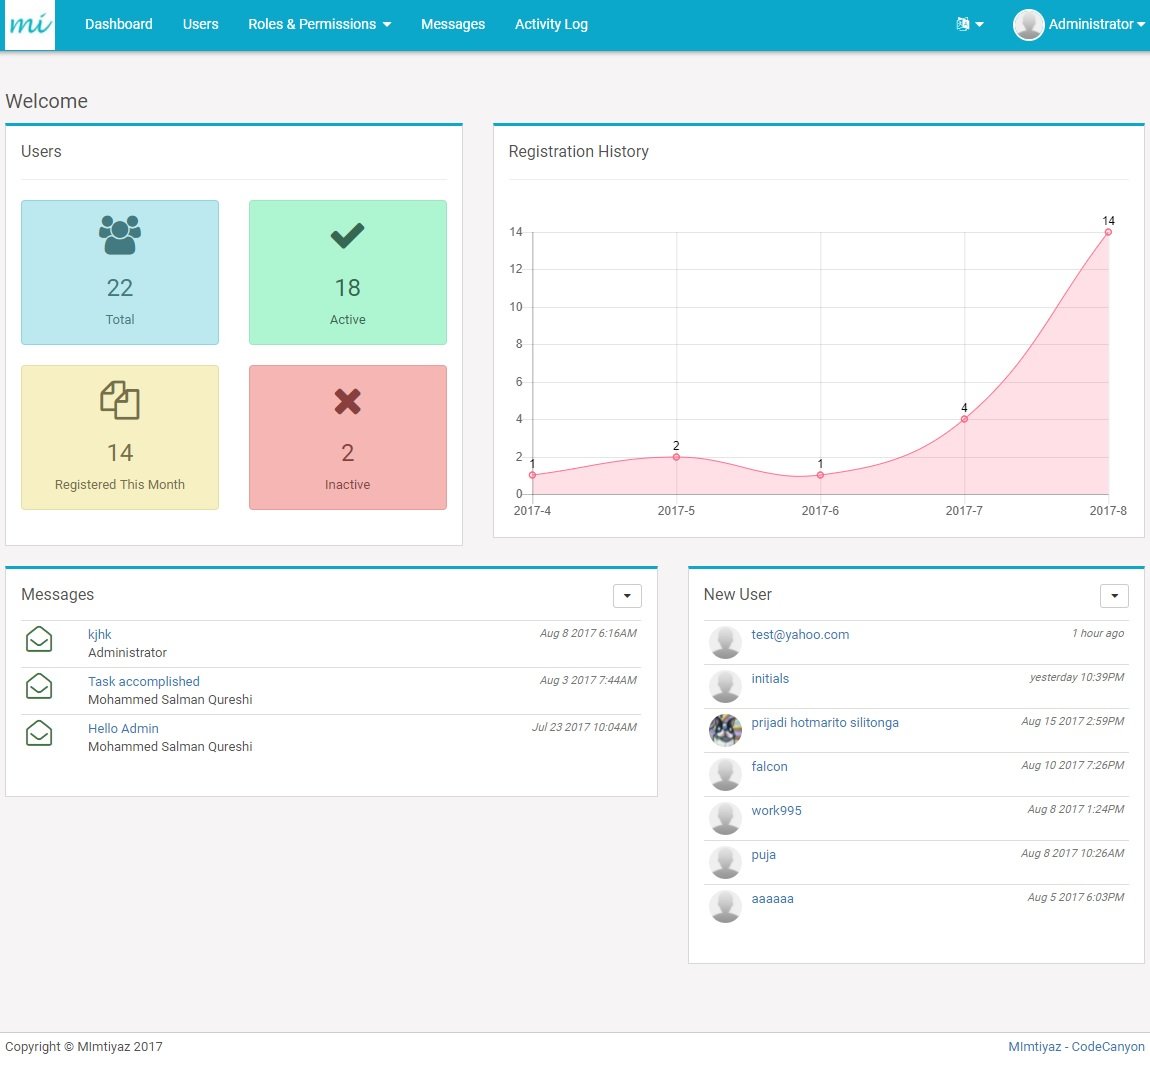
Admin can see the following contents on their dashboard:
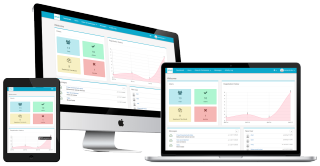
The following image shows the Admin Dashboard:
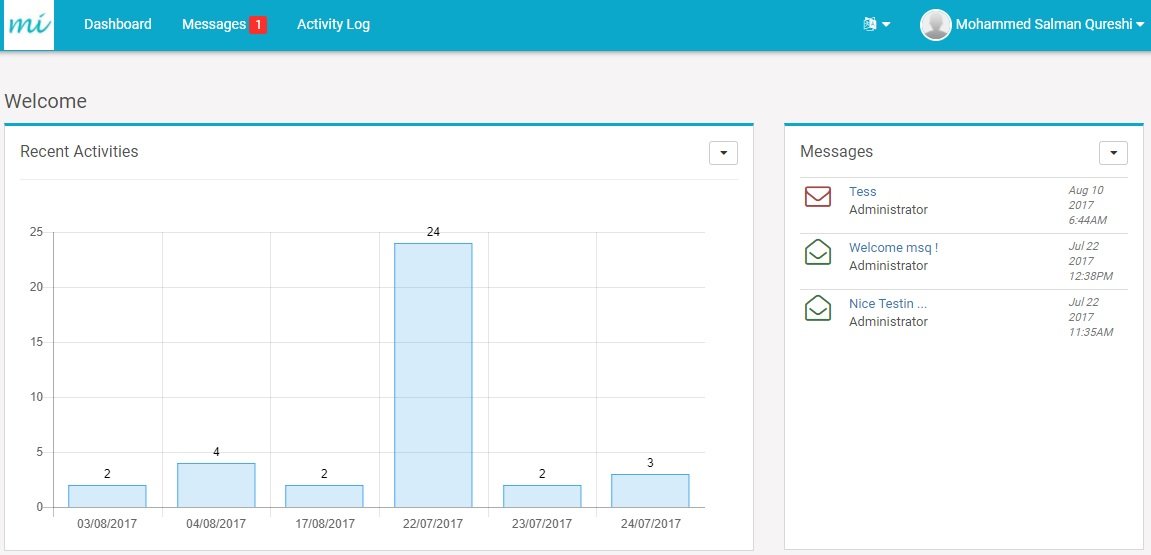
User can see the following contents on their dashboard:
The following image shows the User Dashboard:
An individual user rather than "Admin" is restricted to perform the following actions:
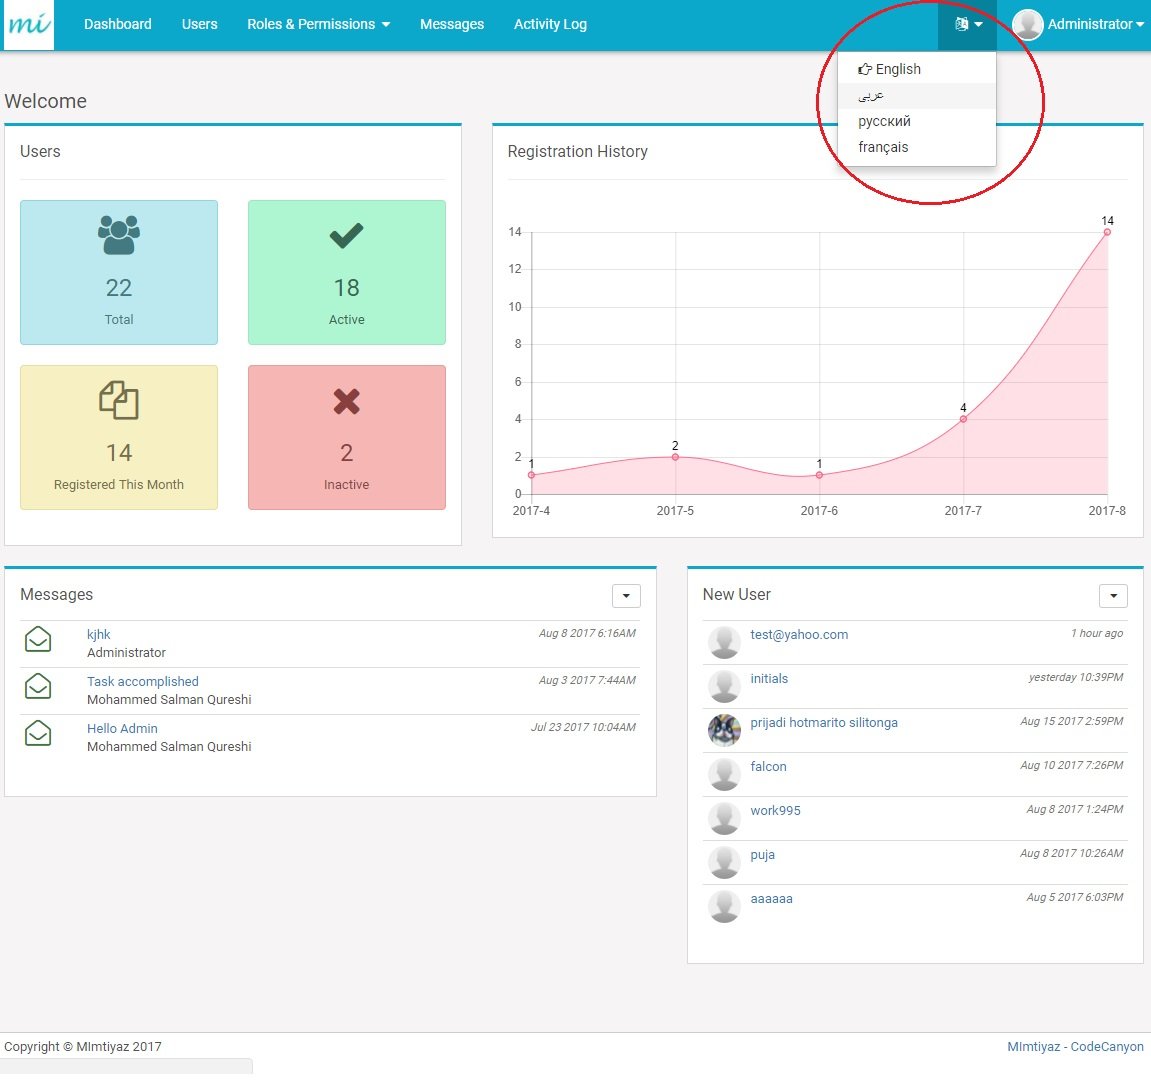
User can switch to any languages just by clicking the button located at the top right corner of the page (For LTR Interface). The demo image is displayed below:
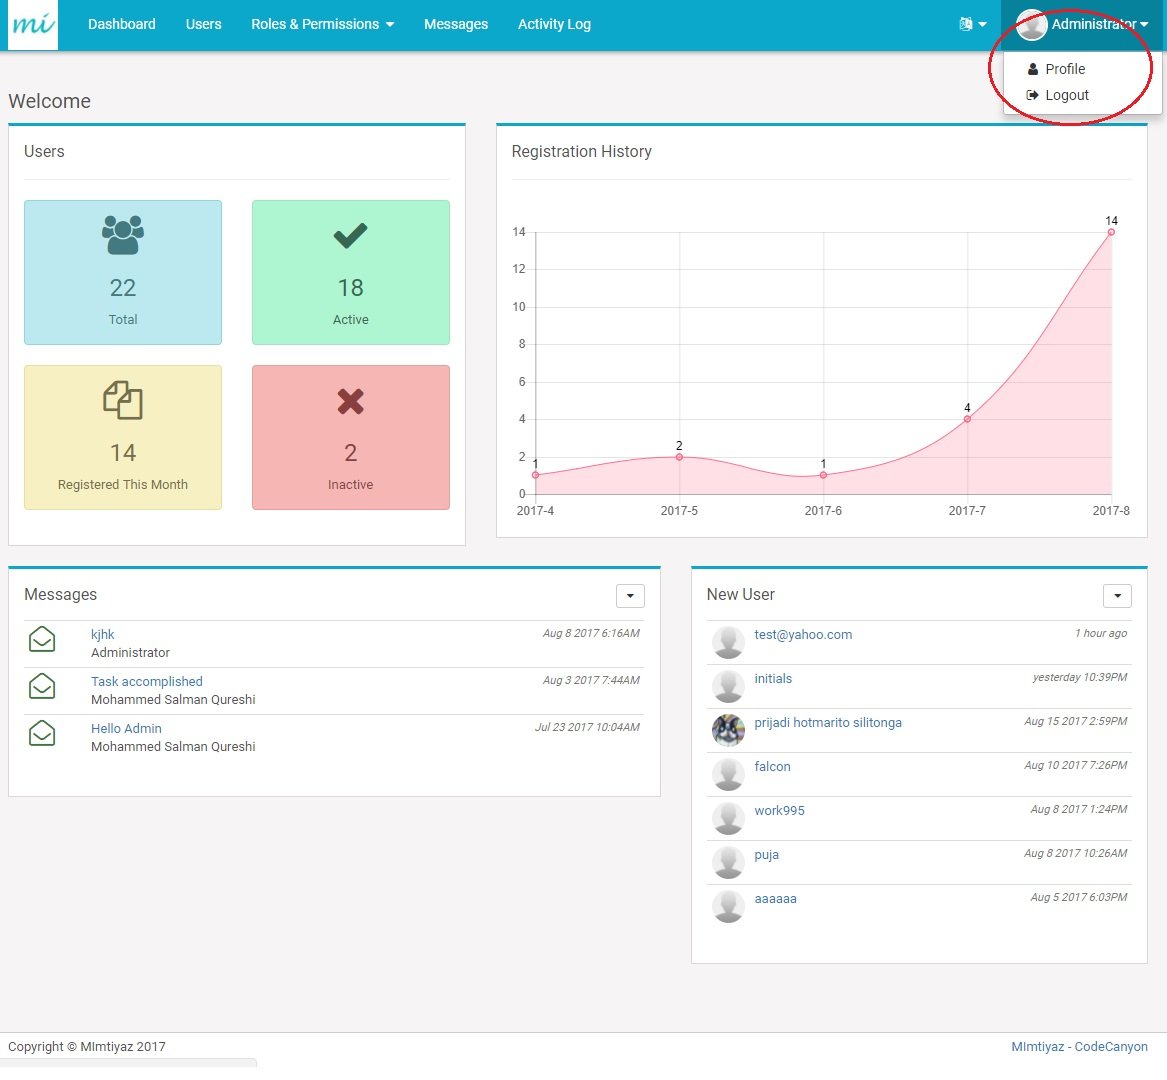
Every user of the system, no matter what's his role is, is able to update his profile. Link to user's profile is available at the top right corner (For LTR Interface), like it is displayed below:
On Profile Details page, users can update their basic informations like First Name, Last Name etc. Also, they are able to update their country from a list of available countries, or to update their birthday using easy bootstrap calendar plugin.
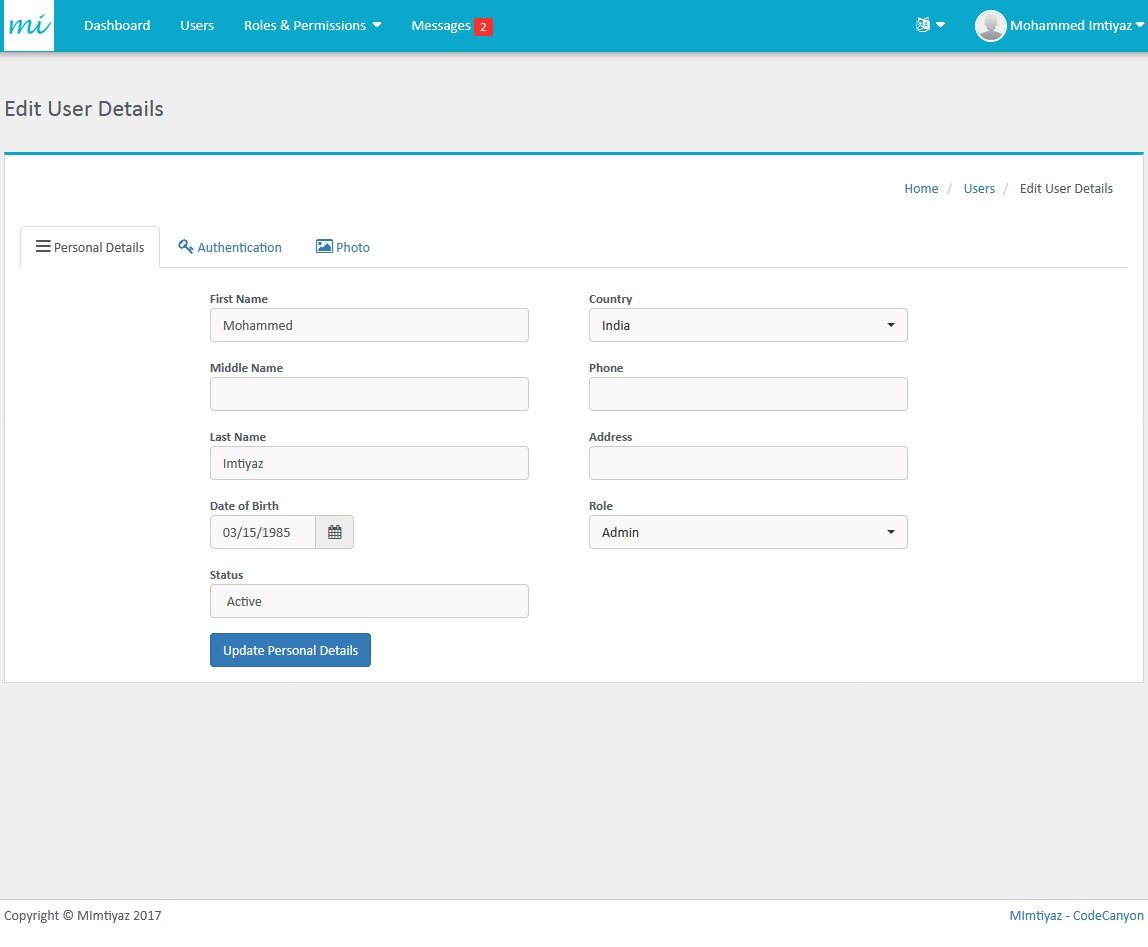
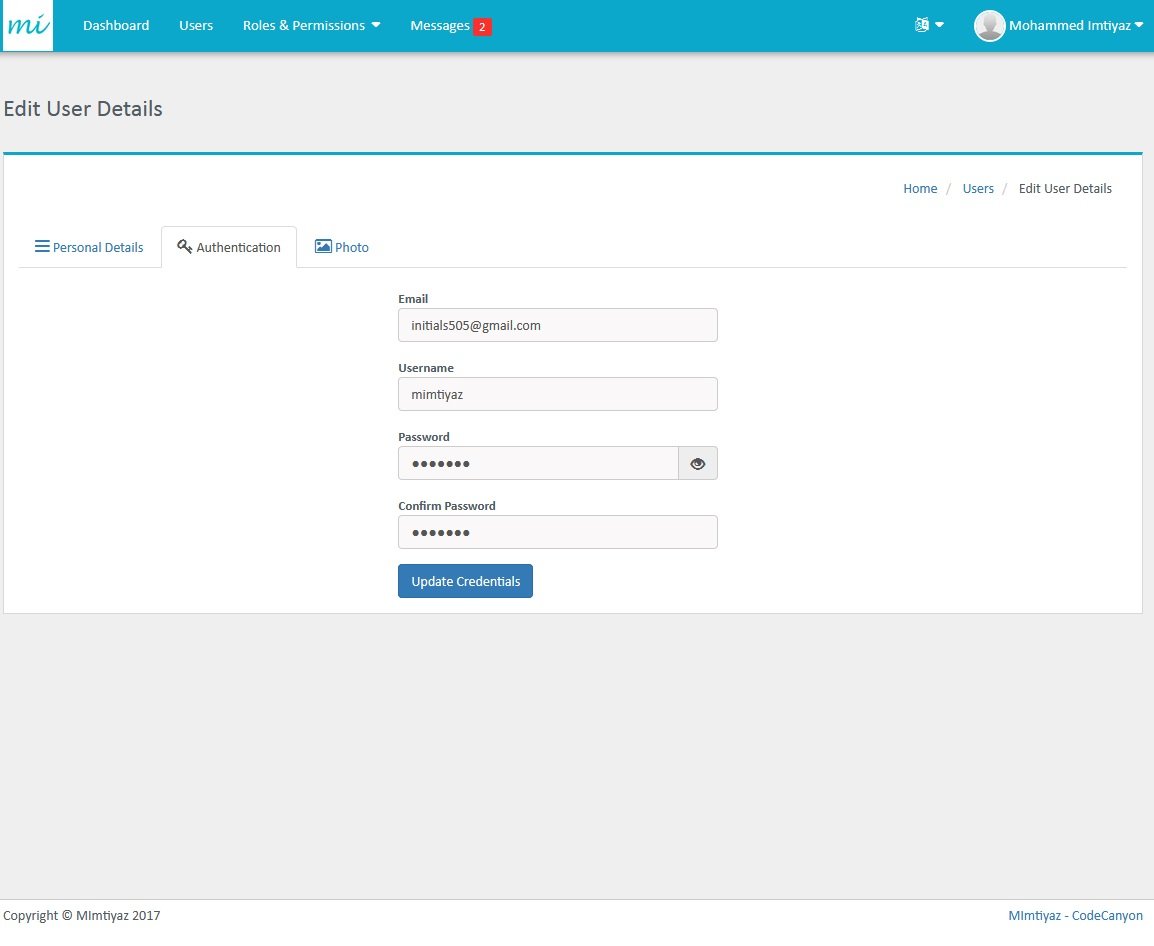
On Authentications tab, every user is able to update his login details including email, username and password. If password field is empty when users click "Update Personal Details" button, password will not be updated.
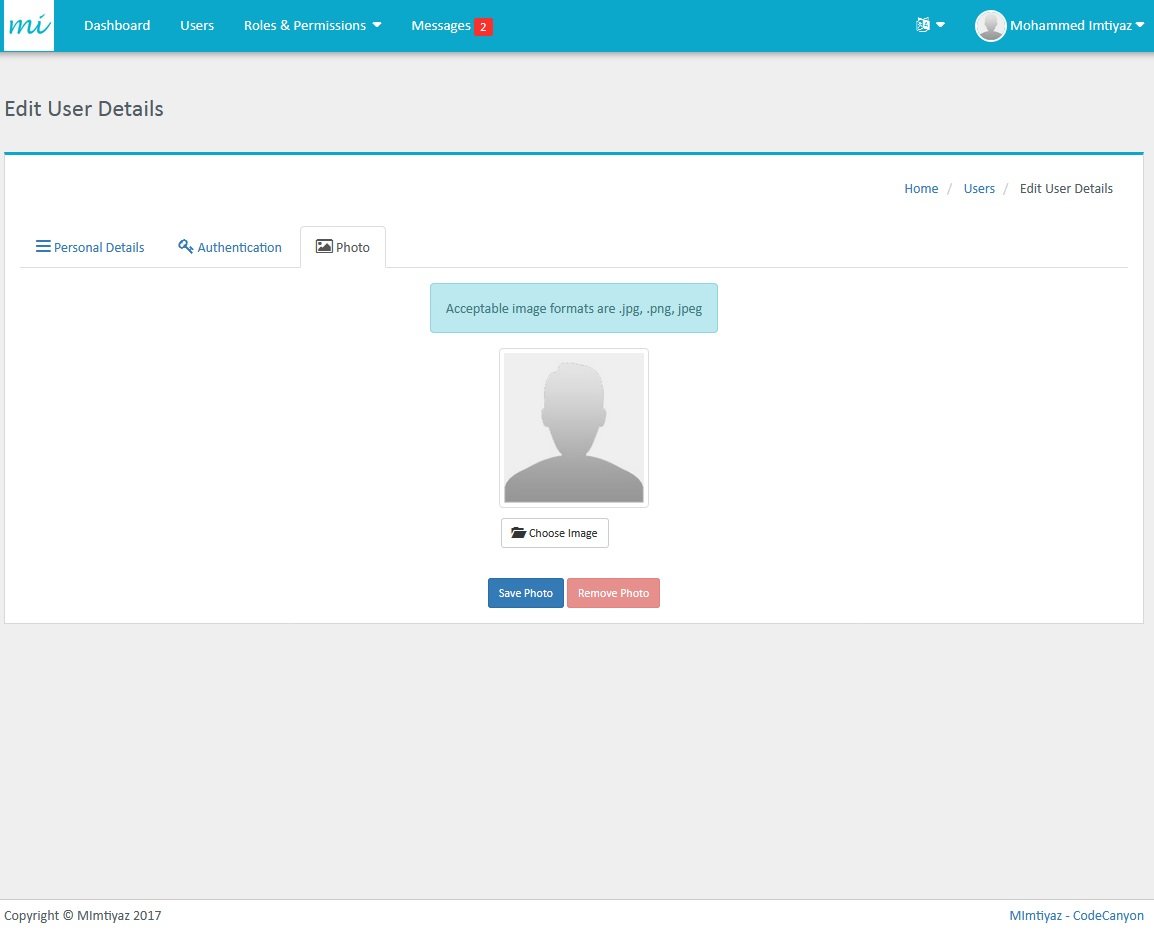
Uploading photo is easy. By clicking "Choose Image" button and selecting any image file and clicking the "Save Photo" button, the photo will be updated.
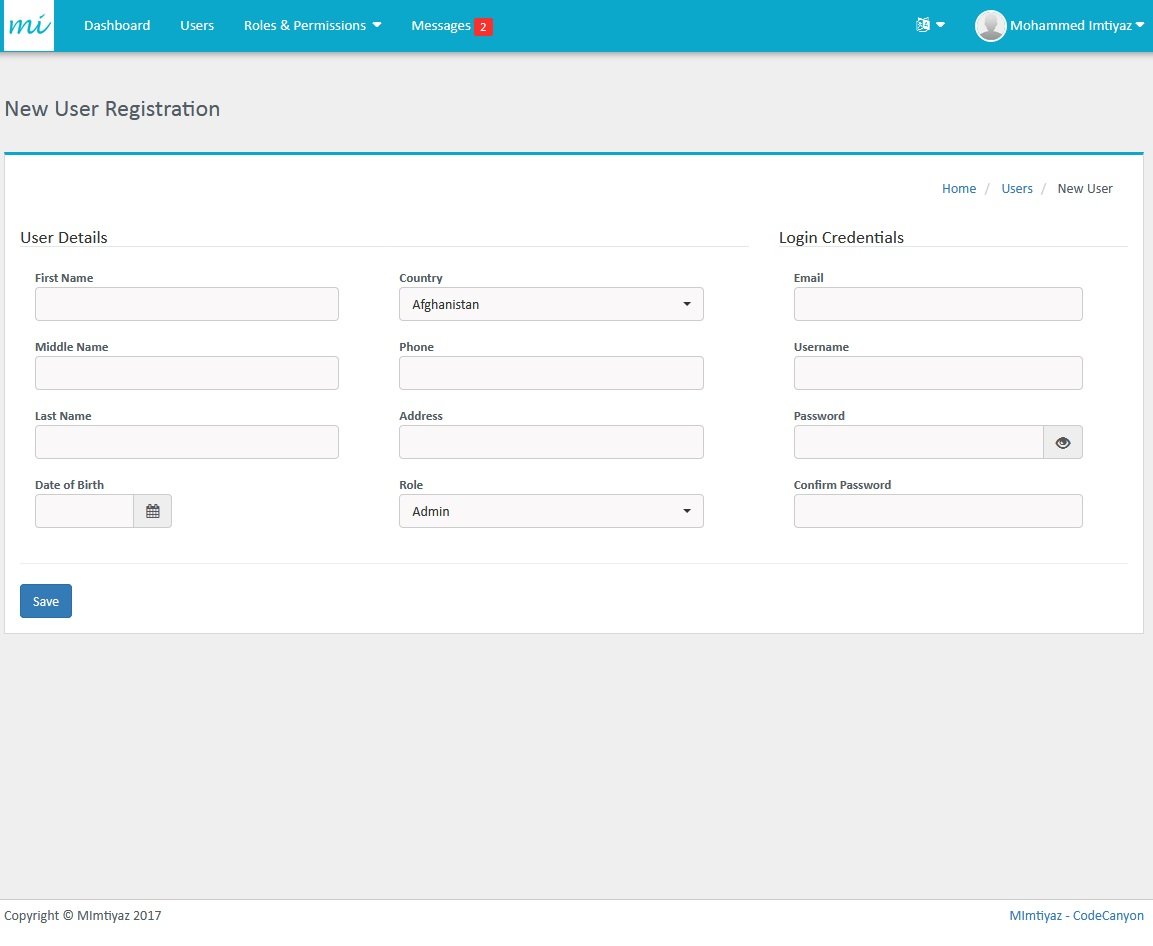
Users can be added with the appropriate roles and permissions. The form for adding new user is displayed below.
Users list page represent the list of all users. Users can be filtered by their status and are searchable by almost all attributes (email, dob, phone, etc..)
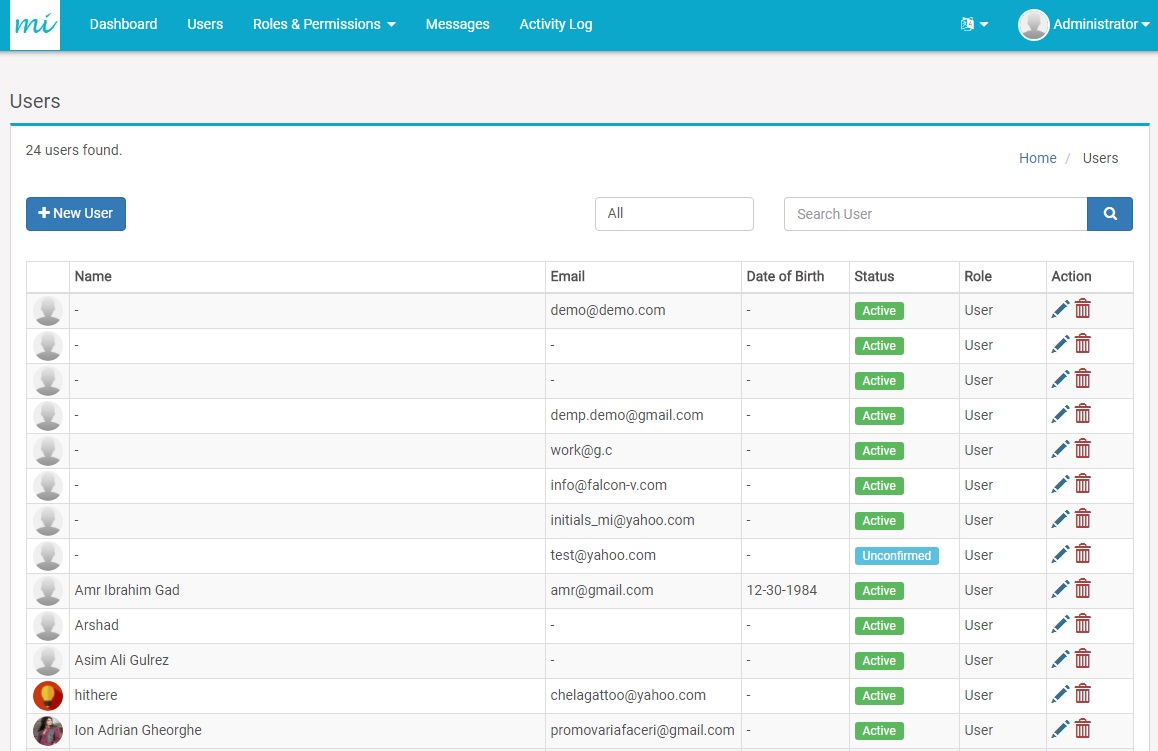
Users can view the profiles from the list by clicking "pencil" icon for specific users on users list page. This will open the page which is displayed when "Profile" button is clicked.
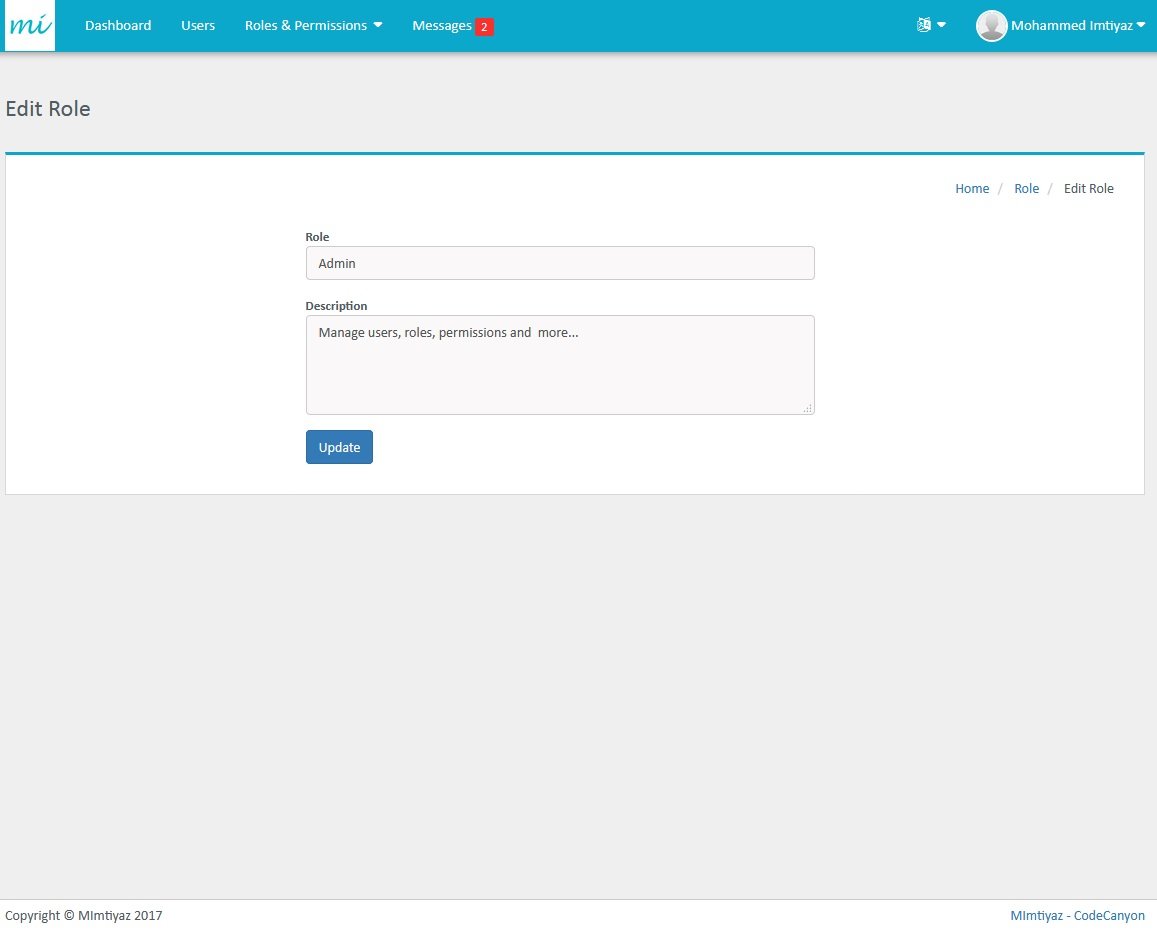
Users can add unlimited number of roles. Form for adding new role, and editing existing roles, is provided below.
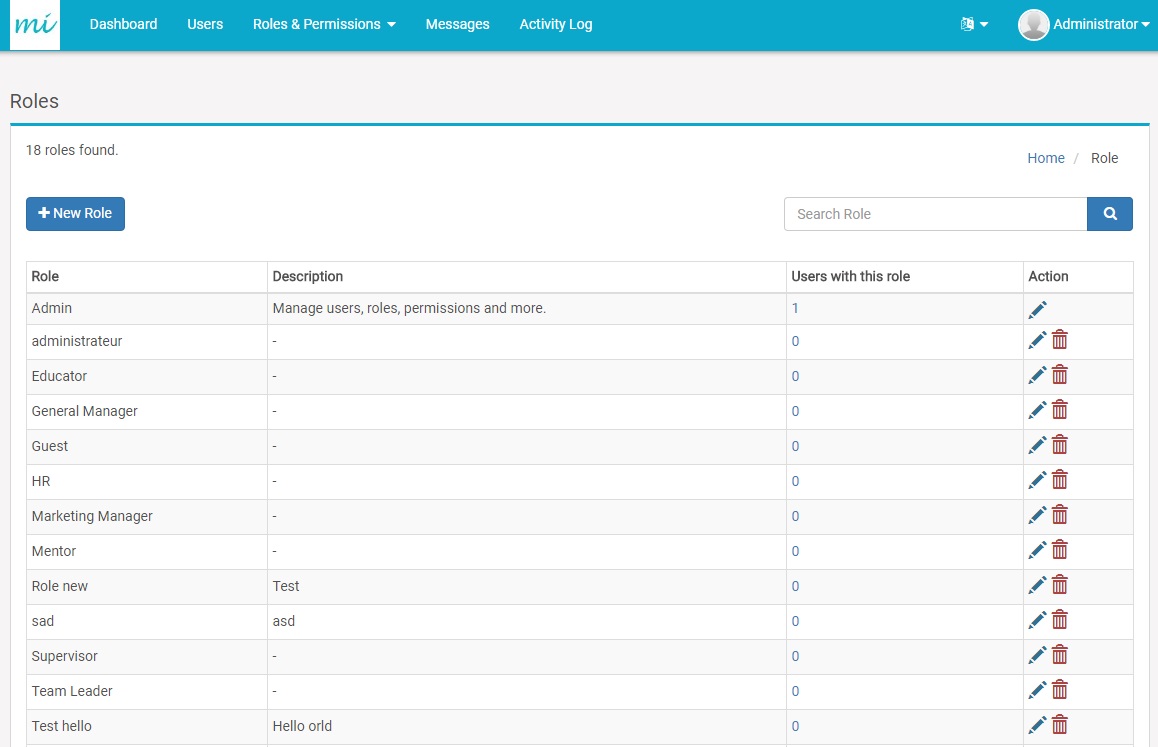
Users can add unlimited number of roles and use them to customize the application. The list also displays the numbers of users with the respective role. The "Trash” button is displayed only for the roles with are not used by any user. Page with the list of roles is given below:
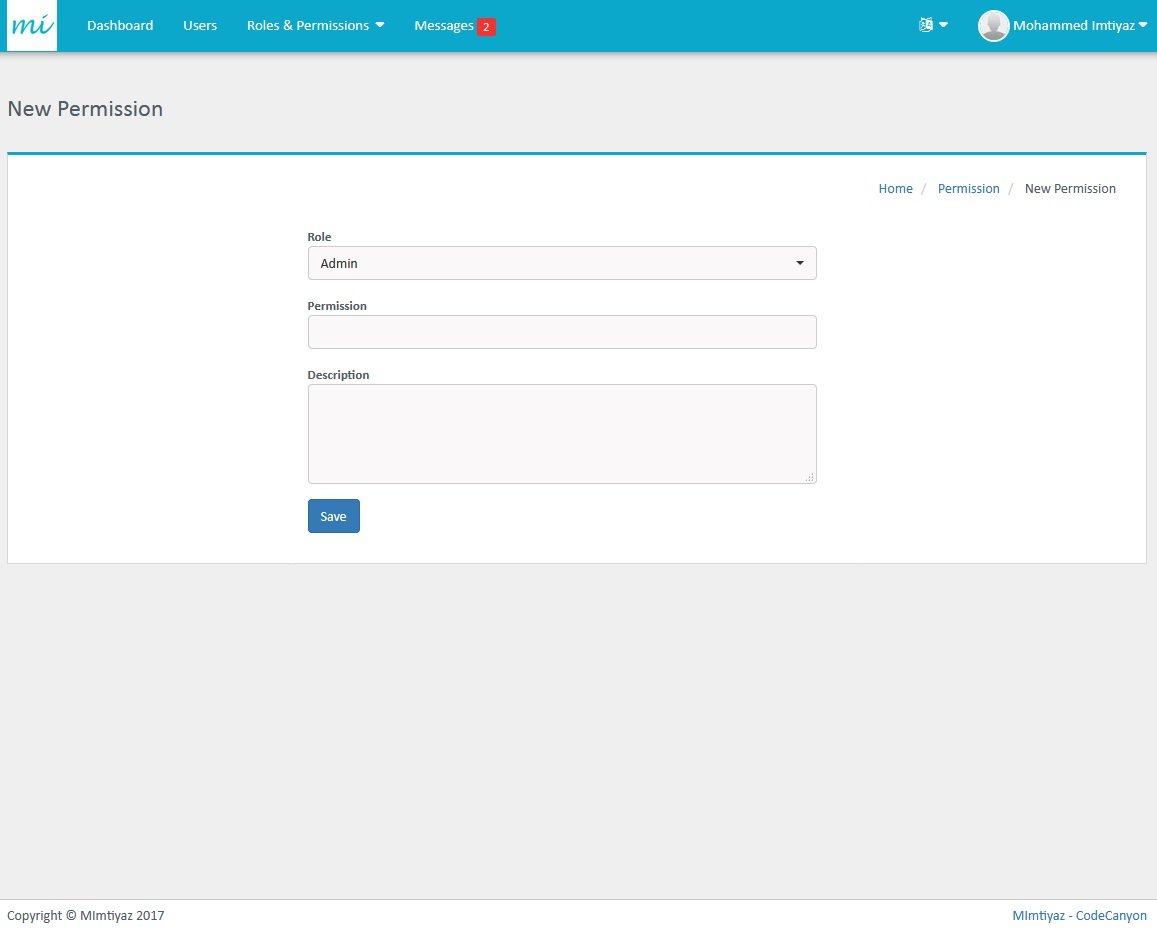
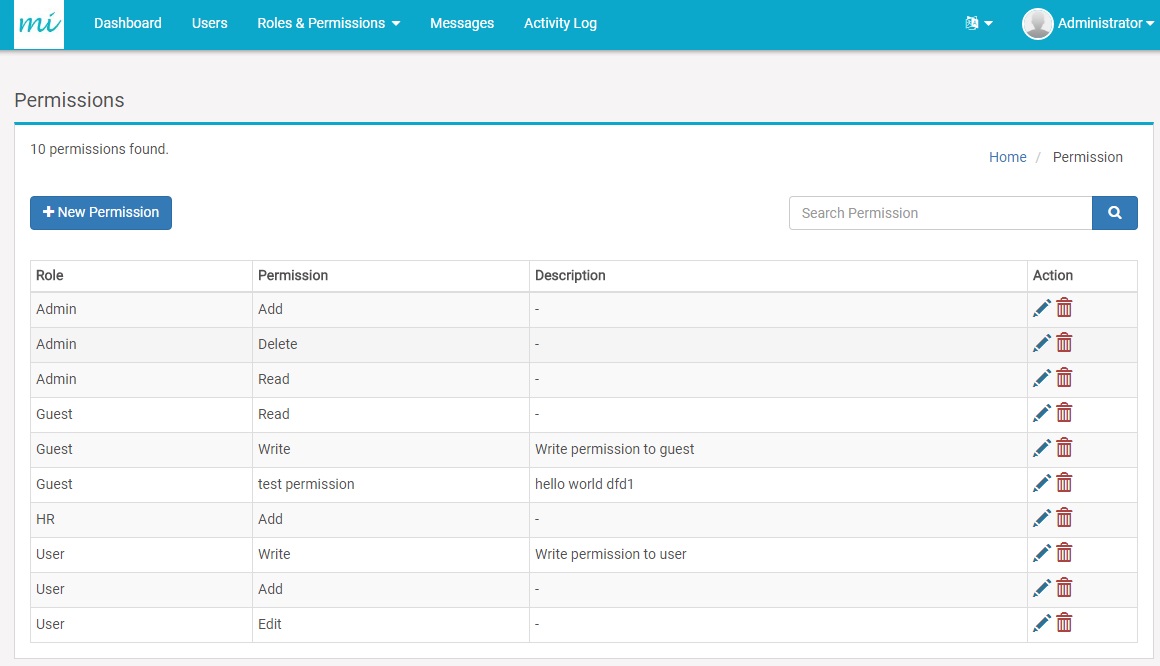
Users can add unlimited number of permissions for a specific roles. Dropdown list for role is disabled when editing any permission in the form. Form for adding new permission, and editing existing permission, is provided below:
Users can add unlimited number of permissions for a specific role.Page with the list of permissions with their respective role is given below:
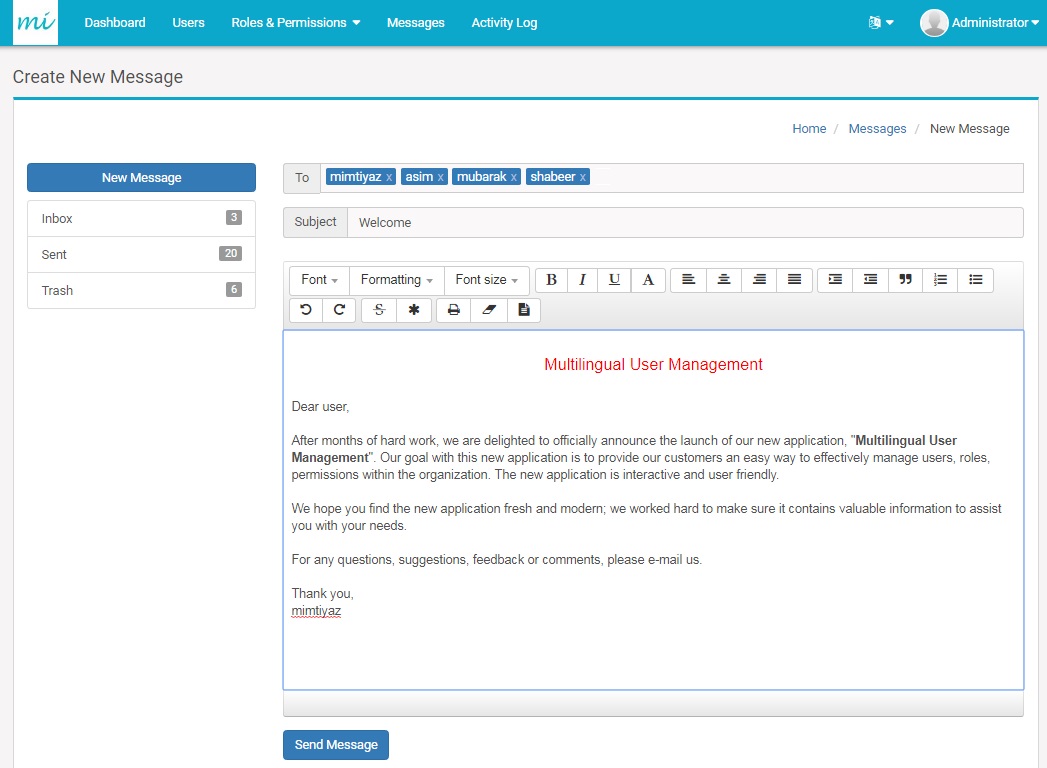
Communication between users is easy, Users can communicate with each other by sending or receiving messages. Either simple text message or HTML drafted messages can be send using message service.
Messages can be send to single user or multiple users simultaneously just by choosing the usernames from the To address field. Form for sending new message is given below:
User are able to see their messages they received in the following form:
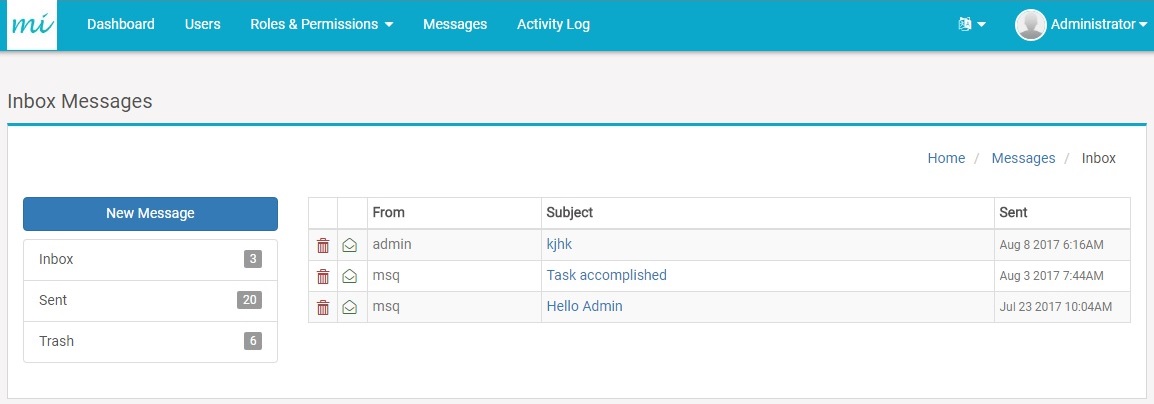
The red envelope indicates that the message is unread and the green envelope indicates that the message is read.
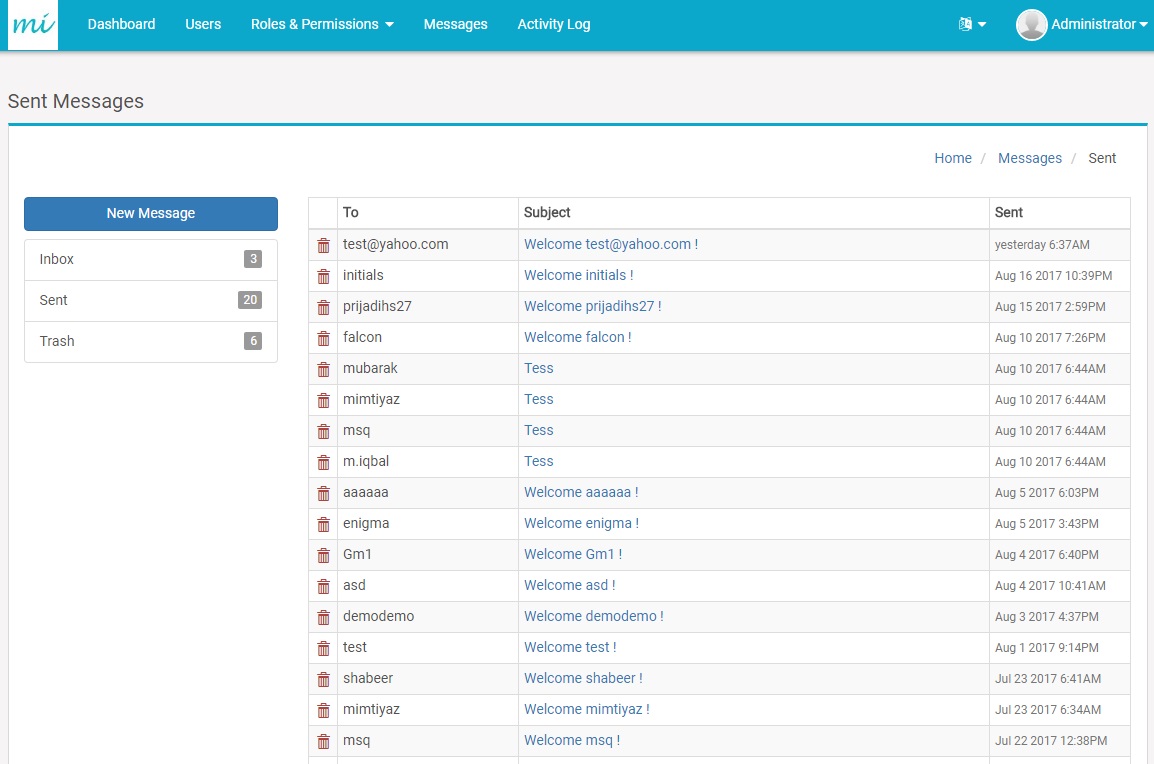
Users can view the messages sent to others in the following form:
Users can view the trash messages in the following form:
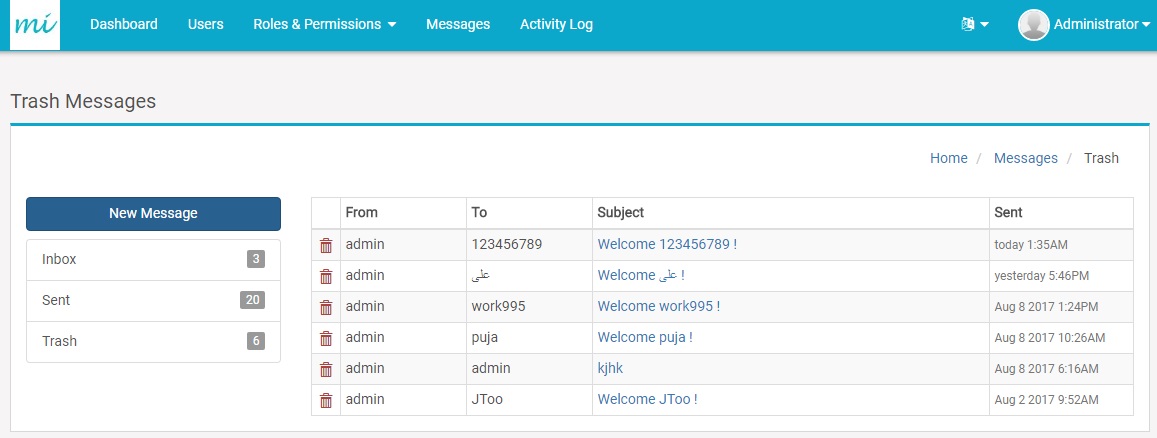
In this form if the delete button is clicked, the message will be permanently removed.
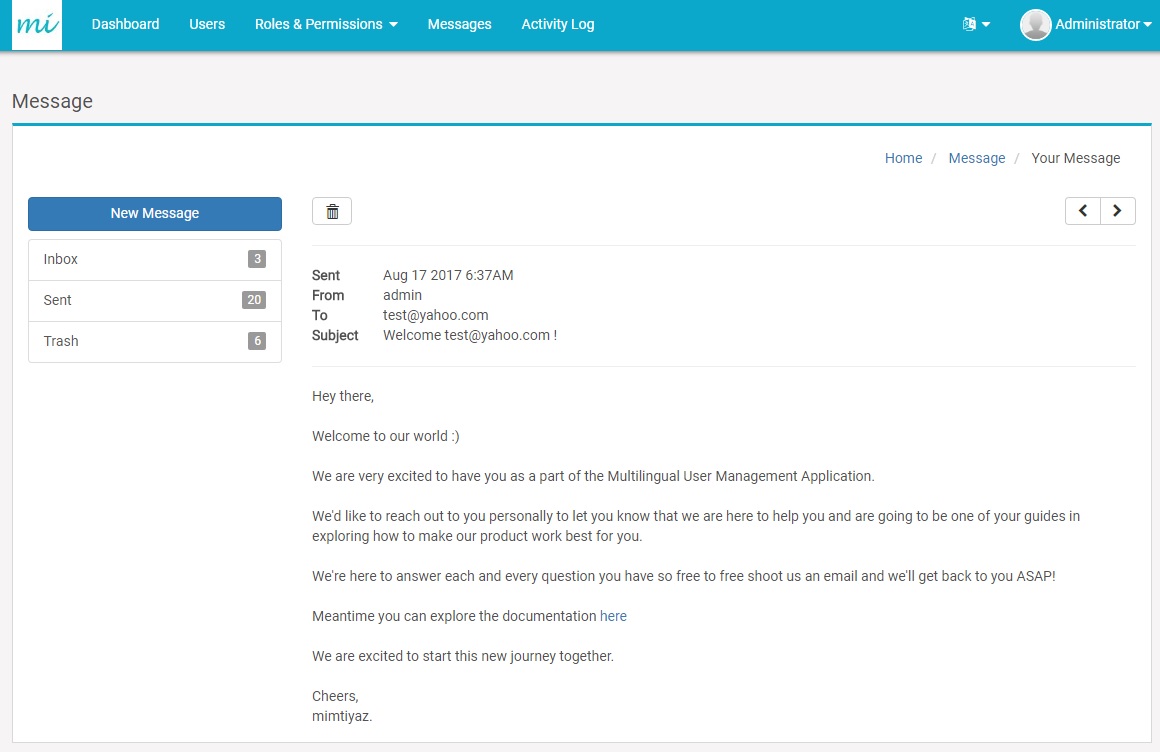
To view the message details, click the subject of message from the list. Form to see the detail message is as follows:
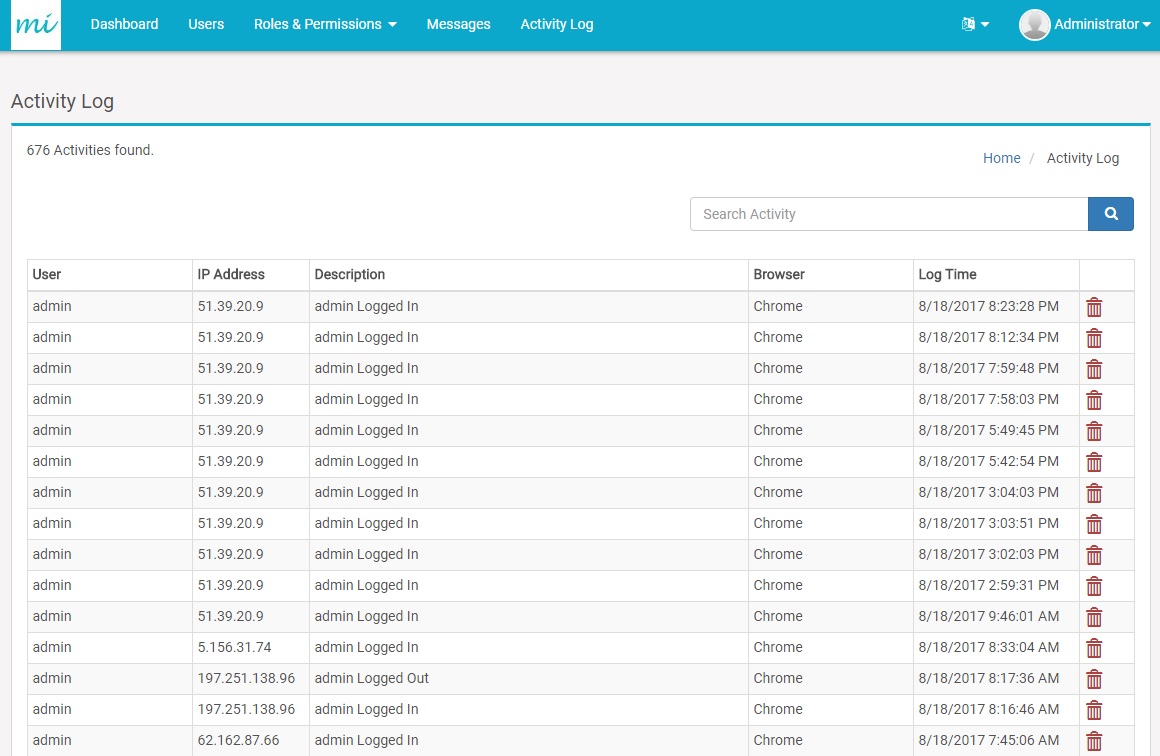
Activity logs display the changed made in the user data that can be viewed by administrator / user to gain insight about the activities respective of the user privilege.
The activity log displays several types of information, an activity log page can be viewed as follows:
How do I get notified of new versions?
The best option is to visit mimtiyaz every now and then for updates and announcements.
Thank you for purchasing my application. If you have any questions that are beyond the scope of this help file, please feel free to email via my user page contact form here.